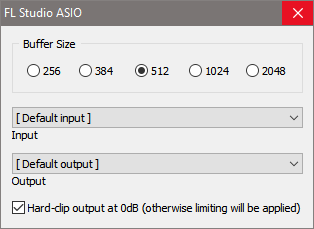
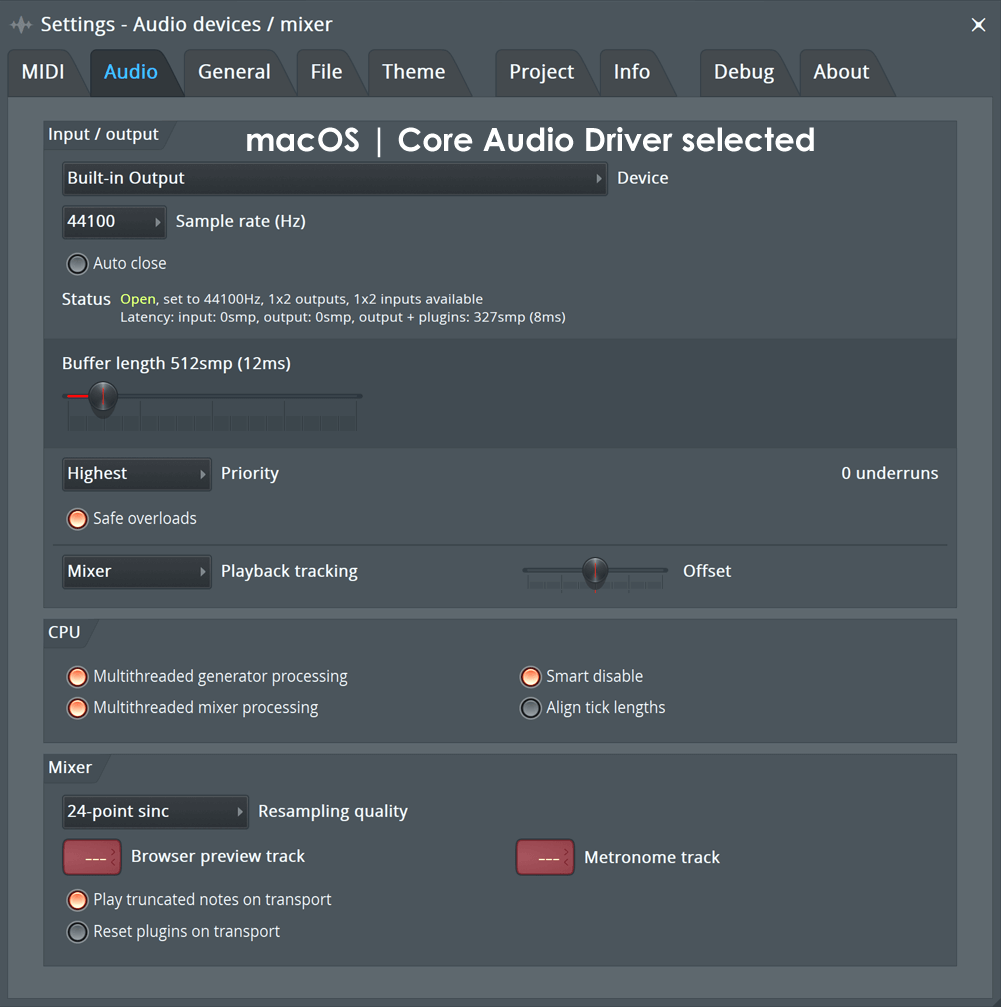
ASIO Audio Interface Setup


SETUP WIZARD

ASIO Audio Interface Setup

Adjust the buffer settings


  1. Windows - Click the Show ASIO panel button to open the audio device driver 'Buffer Size' (latency) settings. You should see the FL Studio ASIO control panel:

  2. macOS - You can adjust the Buffer length direct from the interface as shown below:

  3. Buffer length setting - The buffer is a period of time, a 'window' in which FL Studio can generate sound before sending it to the audio device. Shorter settings make FL Studio more responsive to live inputs (e.g. mouse or hardware controllers) at the expense of a higher CPU load, and possibly underruns. Set the Buffer to around 512 samples. The minimum recommended Buffer length is around 441 samples (10 ms), below this setting very few people report any further improvement in 'responsiveness' and the CPU load climbs rapidly. It's not a competition! NOTE: If you select a different ASIO driver this pop-up panel will look different as it is written by the driver developer.
  4. Windows: Default input/output - Normally these are OK, but if you don't hear sound from FL Studio, click the drop-down menu and select your Speakers (default device).

    NOTES:

    • Converting ms to samples - Divide the Buffer length, in samples, by 44.1 samples (@ 44100 Hz) or 48 (@ 48000 Hz).
    • No ASIO4ALL sound? - If you are having difficulties with the ASIO4ALL driver, see the ASIO4ALL Troubleshooting section.

Comments

Popular posts from this blog

Primary Sound Driver Setup

  SETUP WIZARD Primary Sound Driver Setup Adjust the buffer settings The  DirectSound devices  options will show information about the buffer length (latency) and some other settings used by the audio device driver. The buffer is a 'breathing space' in which FL Studio can generate sound before sending it to the audio device. Shorter settings make FL Studio more responsive to live inputs (e.g. mouse or  hardware controllers ) at the expense of a higher CPU load, and possibly  underruns . Select a Windows DirectSound Driver  - From the drop-down menu select a driver, usually ' Primary Sound Driver '. Set the buffer length : Use the slider to change the buffer length. Longer buffer settings mean lighter CPU load and more stable performance without  underruns  (clicks and pops in the audio). A setting of around 20-40 ms is a good starting point, most users do not notice improved responsiveness below 10 ms, however the 'Primary Sound Driver' usually struggled to deli

Options & Settings (Press F10)

  OPTIONS & SETTINGS Options & Settings (Press F10) Press the F10 function key or select the  Options Menu  to open the  System Settings  window and  Global Project Options . Global settings saved for FL Studio itself, not in  FL Studio project files (FLP) . NOTE:  If the system settings icons are not visible in the side bar on left of the screen, click the  System  button in the top-left corner of the window to expand the section. System Settings Select the icons down the left side of the window. These are global options and settings, affecting all projects. MIDI Settings  - Note & controller Input / Output settings. Audio Settings  - Audio interface & FL Studio audio settings. General Setting  - FL Studio environment settings File Settings  - Load / Save folder settings. Project Settings These are project specific settings and will only apply to the currently loaded project. Project Settings  - Project specific options & settings Project information  - Save projec